Use your IKEA dresser to bring some real style into your bedroom. Trust me, it doesn’t have to stay plain. With a few simple tweaks, it can feel brand new. These IKEA hacks are like giving your furniture a second life.
I’ve always liked IKEA furniture. It’s simple, clean, and easy to work with. But the best part? You can change it however you want. It’s like a blank canvas waiting for your ideas.
These hacks can help you save space. They can add storage. Or just help you create something that feels you. I’ve tried a few myself, and honestly, it feels good to say, “Yeah, I made that.”
Whether it’s for a kid’s room or your own space, these ideas come in handy. Sometimes you just can’t find the perfect piece in stores. That’s when a little DIY magic steps in.
Just one tip before you start. Read the full tutorial first. Some projects are quick. Others need more time and tools. It’s better to know before you grab that hammer.
And if you can, get someone to help. It makes the process easier. Plus, it’s more fun.

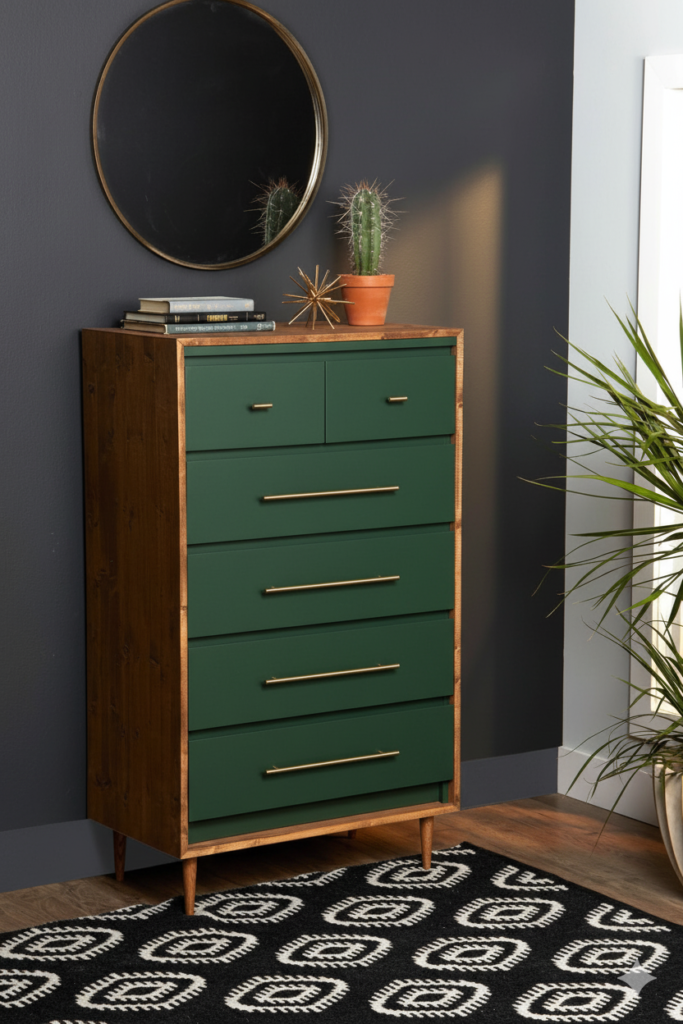
1. From Basic to Beautiful
I’ve seen the Tarva dresser go from plain to stunning. It’s honestly wild. With a few small upgrades, it can look like something from a designer store.
You can add wooden dowels, use chalk paint, and switch the handles to gold ones. Simple changes, big impact. It feels like dressing up a basic outfit with the right accessories.
And the best part? You spend way less money. But it still looks expensive. That’s a win in my book.
2. Rast Hack
The Rast dresser is nice, but it can feel a bit… basic. I once painted mine, and it changed everything. It suddenly felt modern and fresh.
Add some legs, and it looks custom-made. It also becomes easier to move around. Which, trust me, matters when you like to rearrange your room a lot.
A small paint job and a few tweaks can go a long way. It’s quick, cheap, and very satisfying.
3. Tarva Transformation
The Tarva is already good. But it can be so much more. Think of it like a plain cake before frosting.
Add paint, overlays, and new handles. Suddenly, it looks like a totally different piece. It’s kind of amazing how much detail changes the whole vibe.
That’s the beauty of IKEA. The base is there. You just bring it to life.
4. Ombre Tarva Dresser
Ombre never really goes out of style. I tried a soft blue fade once, and it made the room feel calm. Like a quiet sunset.
You can go green, pink, yellow—whatever fits your mood. It’s easy to customize. That’s what makes it fun.
Add new handles, and it feels brand new. And if you get bored later, just repaint it. No stress.
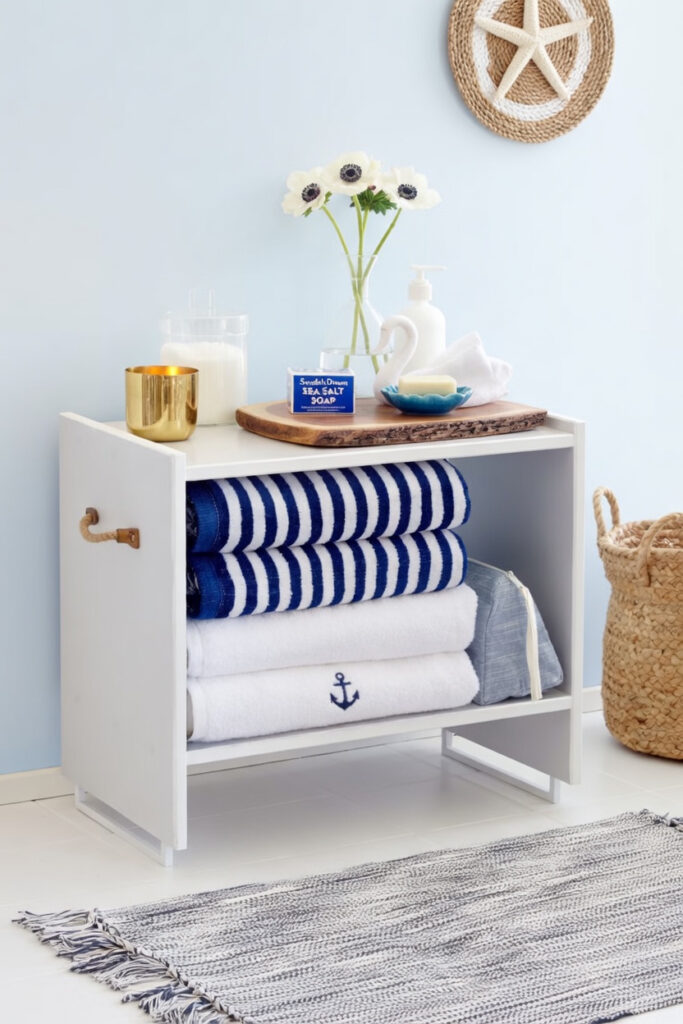
5. Ahoy Matey, It’s a New Tarva!
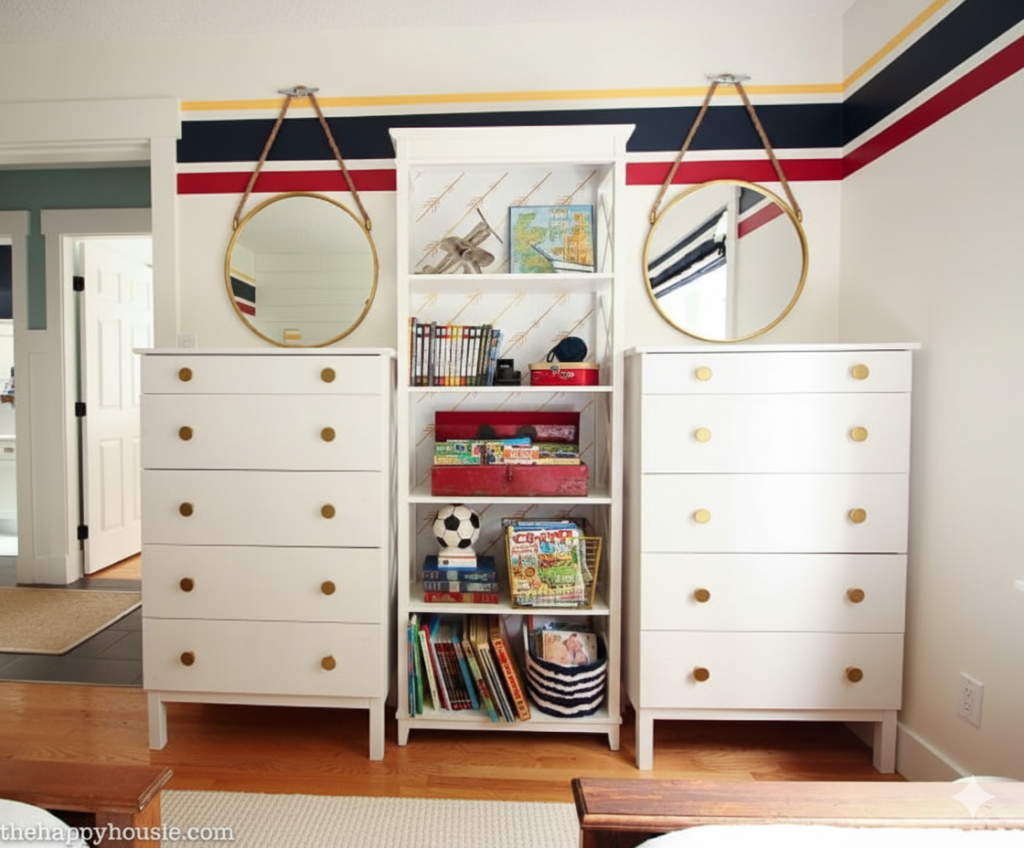
This one is fun, especially for kids. Imagine turning a dresser into a little nautical piece. It’s like bringing the sea into the room.
Use rope, paint, and small details like dock cleats. It sounds fancy, but it’s actually simple. And the result is super cute.
You can go bold with navy or red. Add some anchors on the wall, and you’ve got a full theme going.
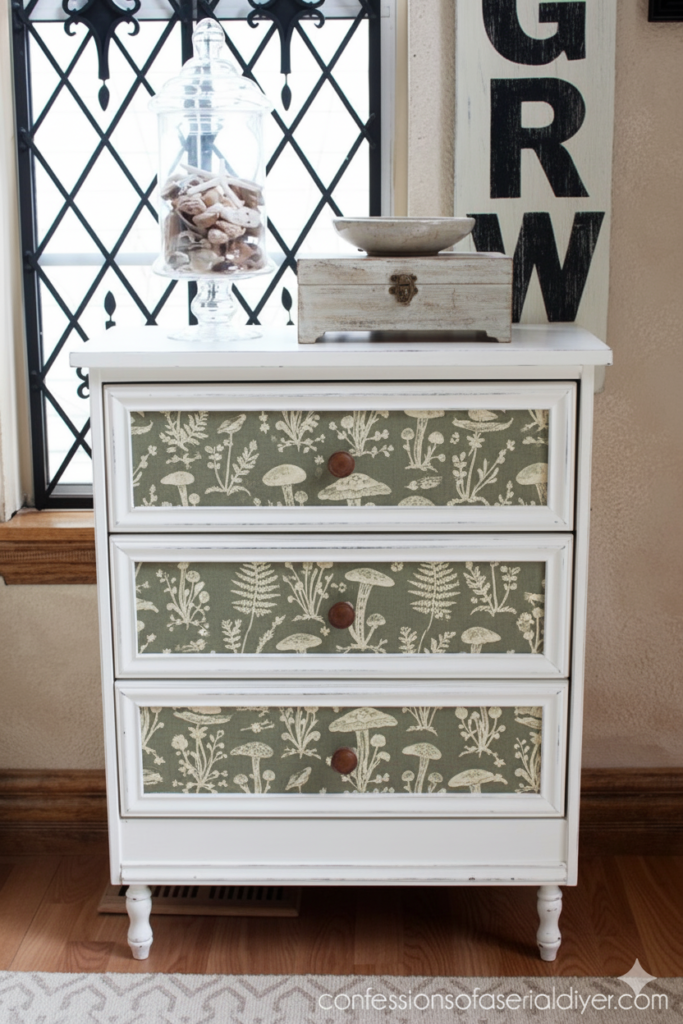
6. One-of-a-Kind Fabric Dresser
This idea surprised me the first time I saw it. Fabric on a dresser? Yes, and it looks amazing.
Pick a fabric you love. Then paint the dresser to match. It creates a soft, cozy feel that paint alone can’t give.
You’ll need adhesive spray to make it stick well. But once it’s done, it feels truly unique. Like something you won’t see anywhere else.
7. Geometric Dream Dresser
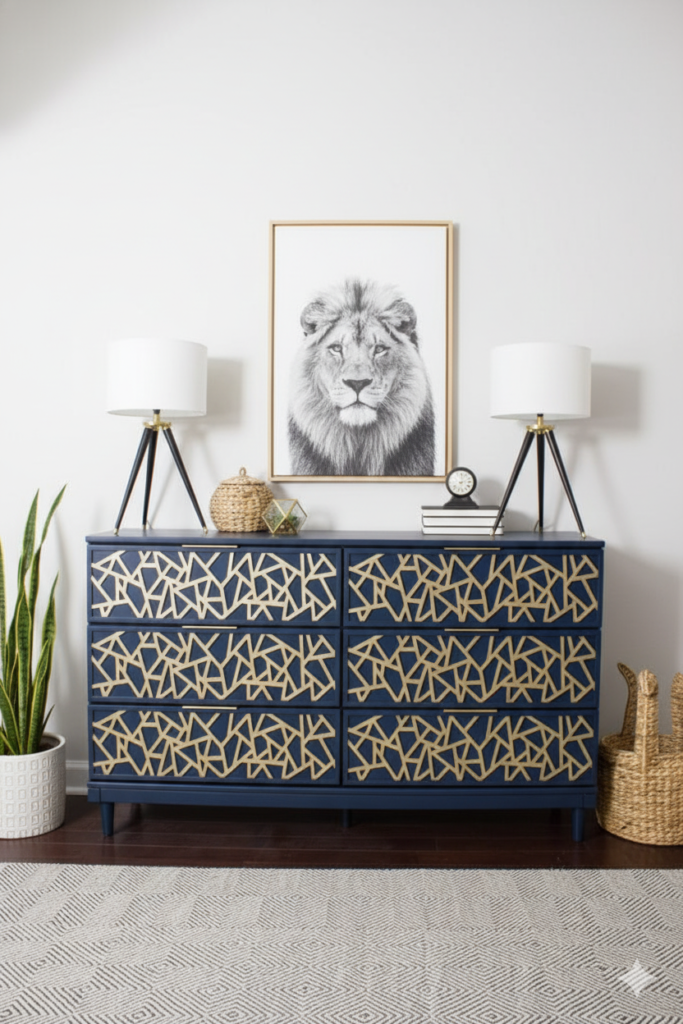
If you like modern design, this one is for you. The overlays create bold shapes. It instantly becomes the center of the room.
Add new legs, fresh paint, and nice handles. It all comes together like a puzzle. Each piece matters.
It’s a great way to update an old dresser too. You don’t have to buy new. Just upgrade what you have.
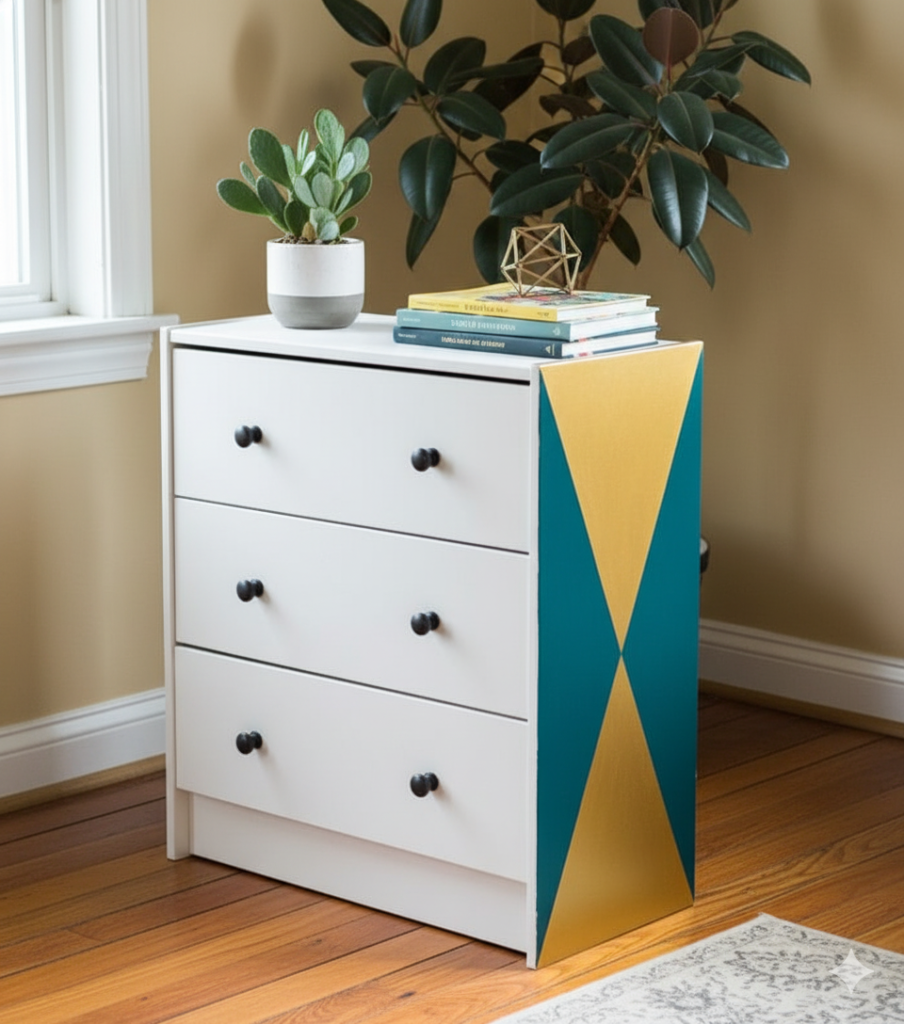
8. Colorblock Nightstand

This is one of the easiest hacks. But the result looks so good. I love projects like that.
You paint sections in different tones. It gives a rustic, relaxed look. Almost like something from a cozy cabin.
The open space is useful too. You can keep books or small items there. It’s simple, but smart.
9. Whimsical Dresser DIY
This one feels like art. It’s playful and creative. Perfect for a kid’s room or even a fun kitchen corner.
What I love most is how simple it is. You don’t need complex tools. Just glue and everyday items like washers.
It shows that creativity matters more than skill. You don’t have to be an expert to make something beautiful.
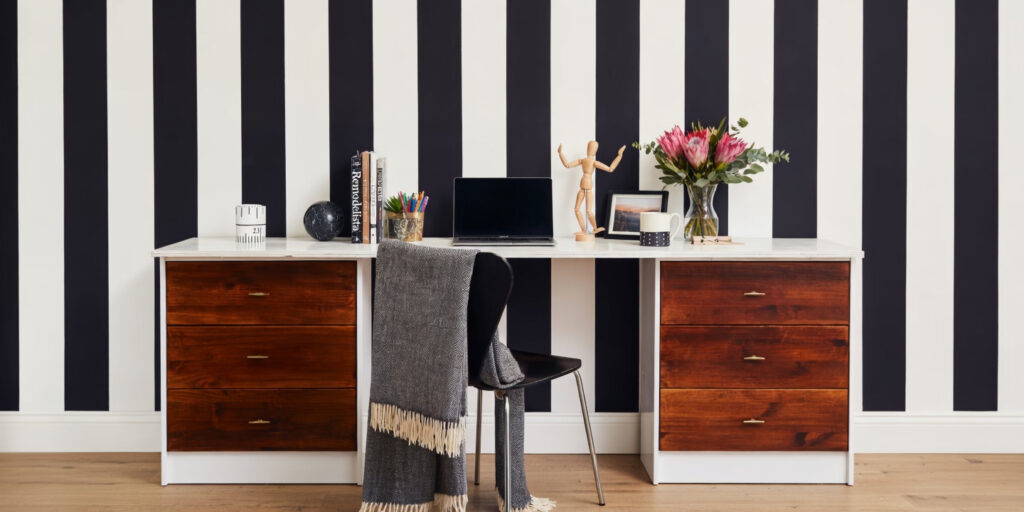
10. Two Small = One Big

This idea is clever. You take two smaller dressers and turn them into one big piece. It feels seamless.
It also makes the room look more organized. Instead of two separate units, you get one clean look.
Add paint and new handles, and it looks brand new. You can even use it as a desk or in your office. It’s flexible, which I love.
Honestly, these hacks changed how I see furniture. It’s not just about buying. It’s about creating. And once you start, it’s hard to stop.
Here’s your rewritten version in a warm, friendly, easy-to-read tone:
11. The Magic of Wallpaper
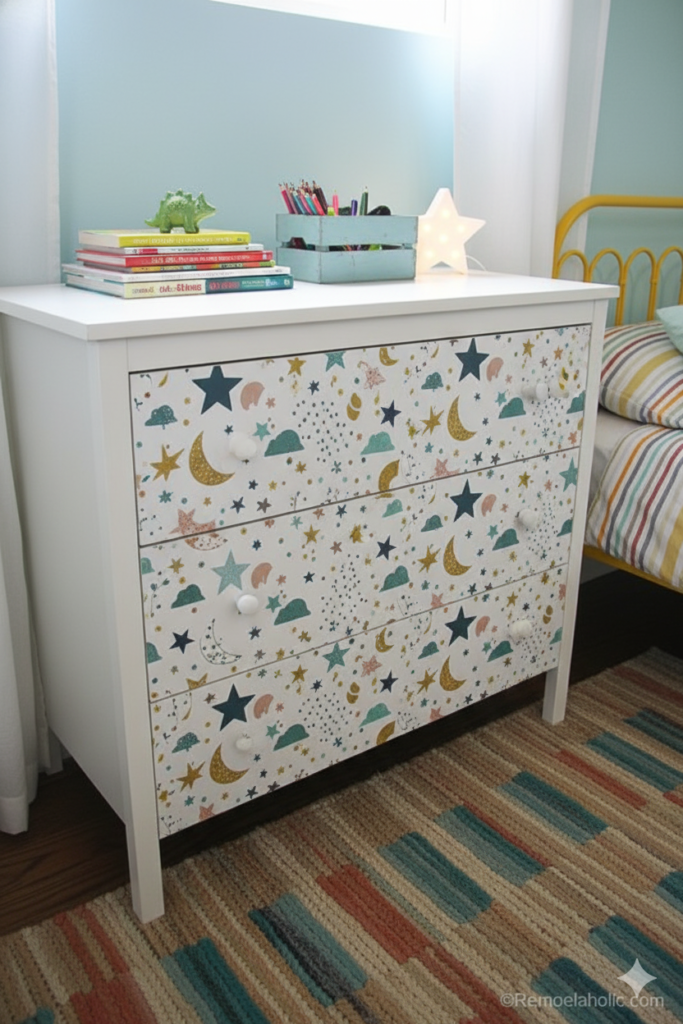
Okay, hear me out. If your IKEA dresser feels a bit dull, wallpaper can work like magic. I tried this once when I didn’t want to spend money on a full makeover, and wow—it changed everything. Just pick a fun print and add it to the drawer fronts. It’s quick, cheap, and looks way more expensive than it is.
And if you can spare a little extra cash, swap out the drawer pulls too. It’s such a small change, but it really pulls the whole look together. Honestly, it feels like giving your dresser a mini glow-up without the stress.
12. Make It Truly Yours

The Rast dresser is like a blank canvas. It’s simple, affordable, and ready for your personal touch. I love pieces like this because you can shape them to fit your style.
With just a few tweaks—like adding legs, using chalk paint, or even a bit of wallpaper—you can create something that feels totally new. It doesn’t take much time or skill either. And the best part? You end up with more storage and a piece that actually feels like you.
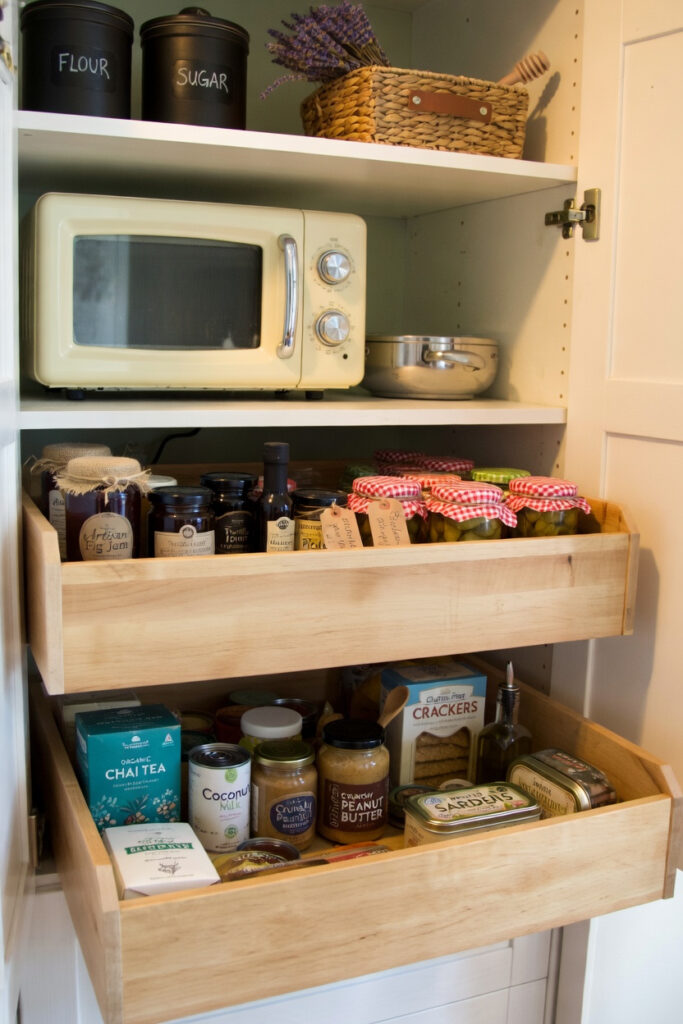
13. Rustic Malm Vibes
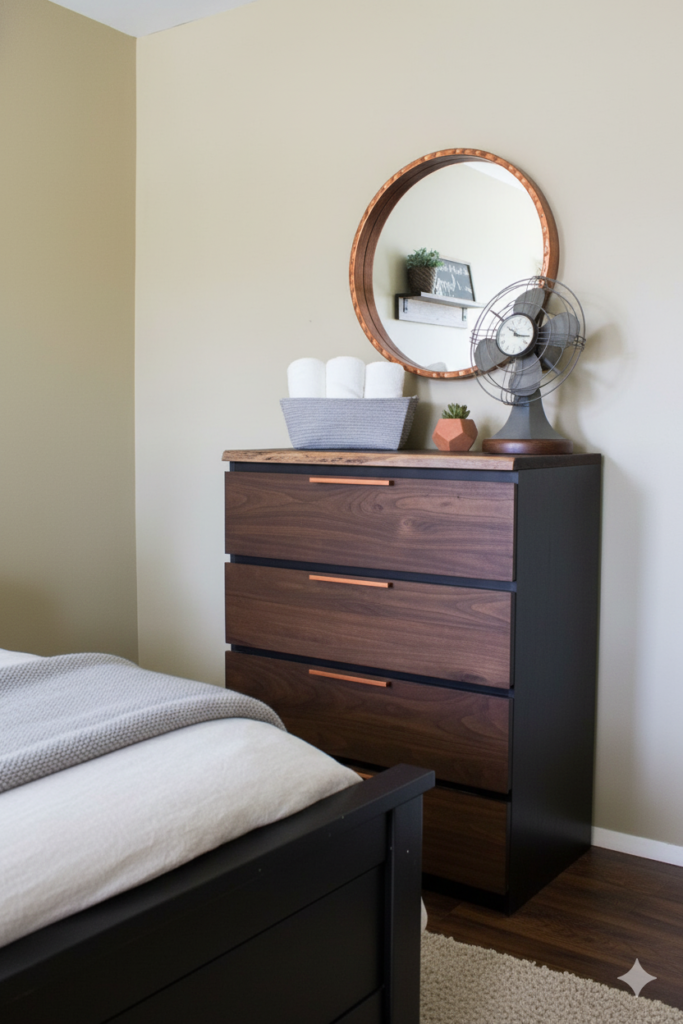
IKEA furniture leans modern, but not everyone wants that sleek look. If you love cozy, rustic spaces, don’t worry—you can still make it work. I’ve seen this done, and it feels like watching a city apartment turn into a countryside cottage.
Use woodgrain vinyl on the drawers and paint the rest. That’s it. The mix gives warmth and texture, like real wood without the high cost. Try a few color combos before settling—sometimes the best look comes from a bit of trial and error.
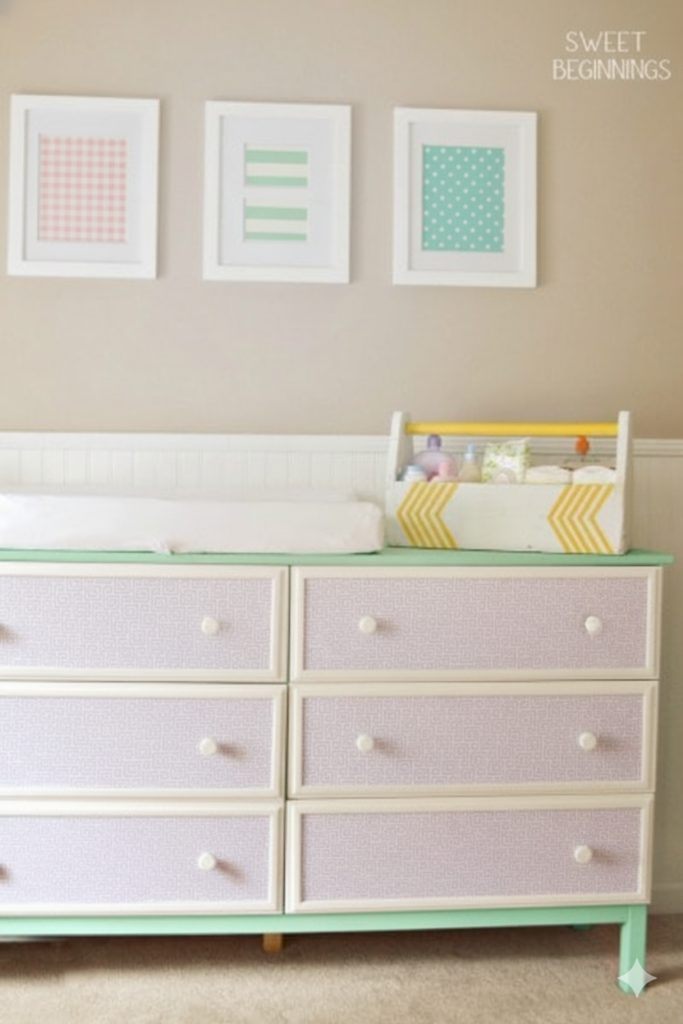
14. Retro Tarva for a Nursery
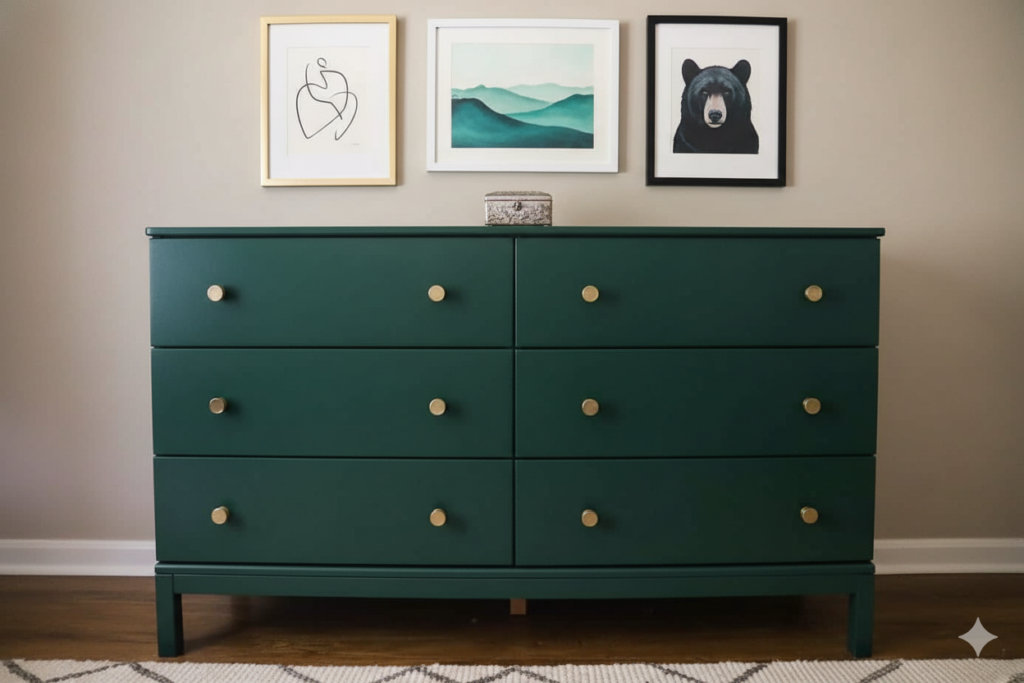
This idea is so smart, especially if you’re setting up a nursery. A simple Tarva dresser can turn into a changing station with just a few updates. I love how practical this feels without losing style.
A soft green paint, small knobs, and a changing pad on top—that’s all it takes. And the best part? You won’t need to replace it later. As your child grows, you can repaint it and keep using it.
15. A Little Pink Dream
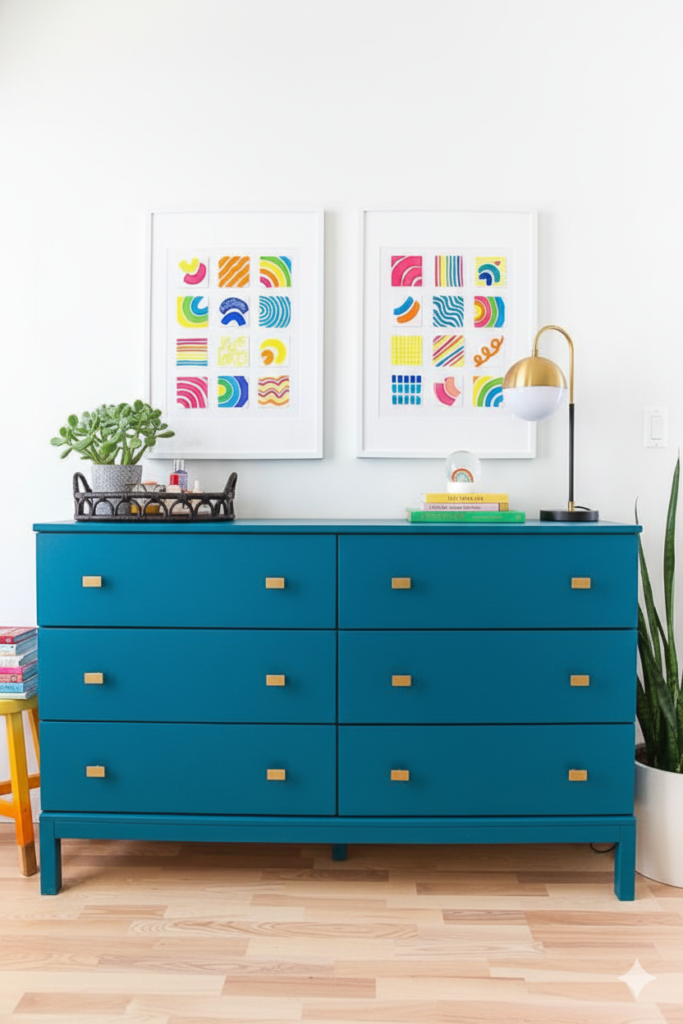
Sometimes all you need is color. I once painted a piece of furniture on a whim, and it instantly lifted the whole room. That’s the power of a good paint job.
With the Tarva dresser, a soft pink (or any color you love) can make it feel fresh and personal. Use furniture paint for a smooth finish, then add nice drawer pulls. It ends up looking like something from a boutique store, not a flat-pack box.
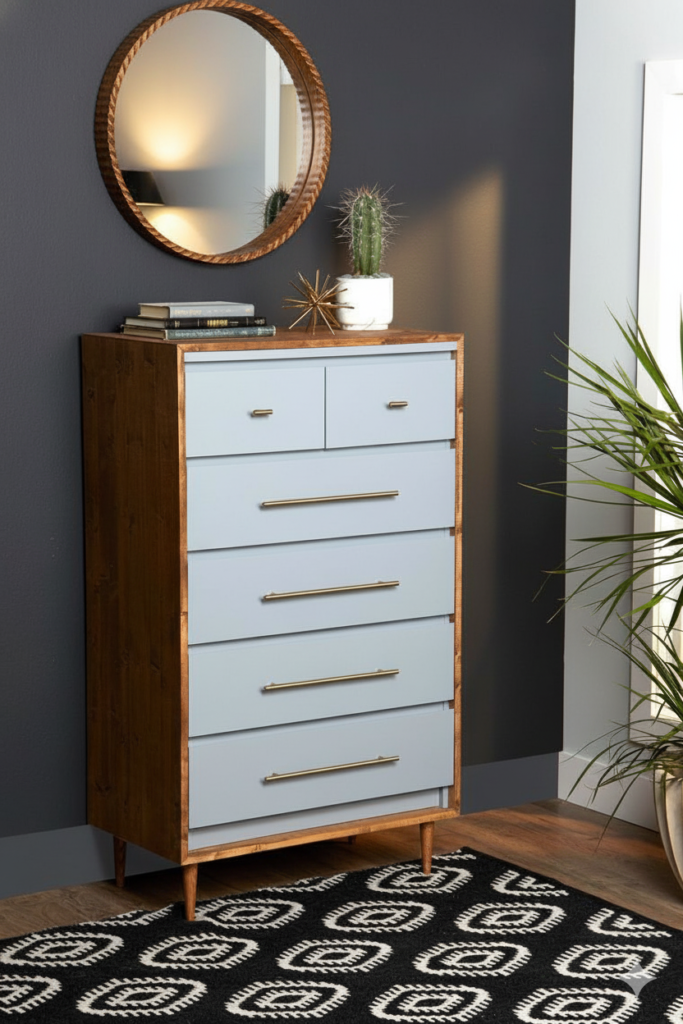
16. From Basic to Beautiful
If you want that high-end look without the price, this one’s for you. Adding wood panels, paint, and stylish pulls can totally transform your dresser. It’s like dressing it up for a fancy event.
It does take a bit of effort, but nothing too complicated. And when you’re done, it won’t even look like IKEA anymore. It’ll feel custom, like something you’d proudly show off.
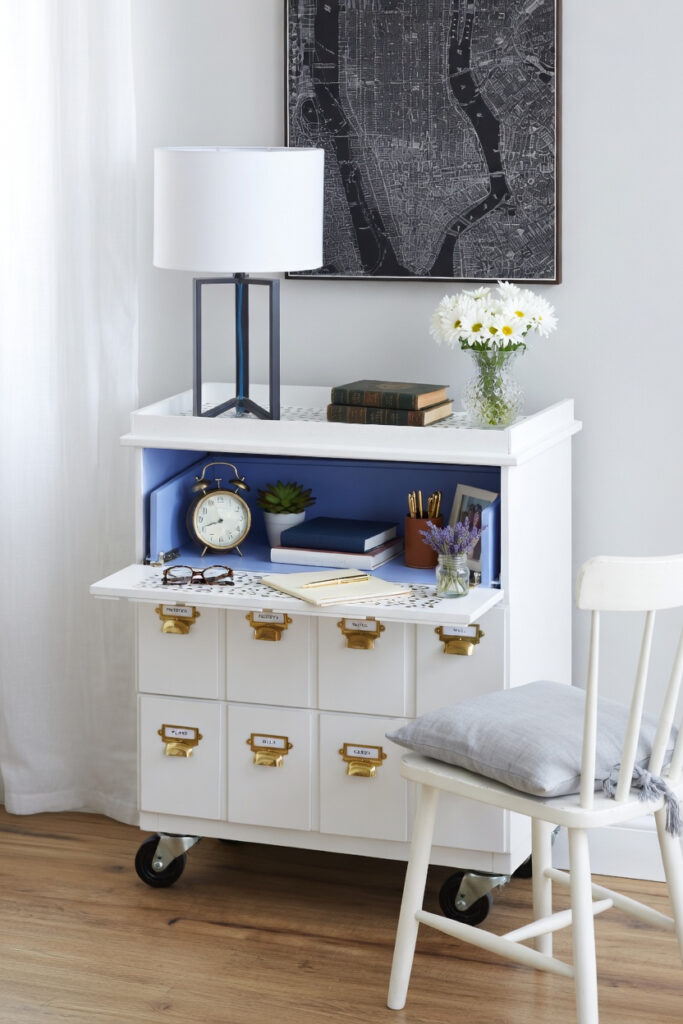
17. Turn It Into a Desk
This one blew my mind the first time I saw it. A dresser… turned into a desk? Yes, and it actually works really well.
With some wood and a few smart additions, you get a rolling desk with storage, a pull-out surface, and even space for decor. It’s perfect for small rooms or student spaces. It does take time, so maybe save it for a weekend project.
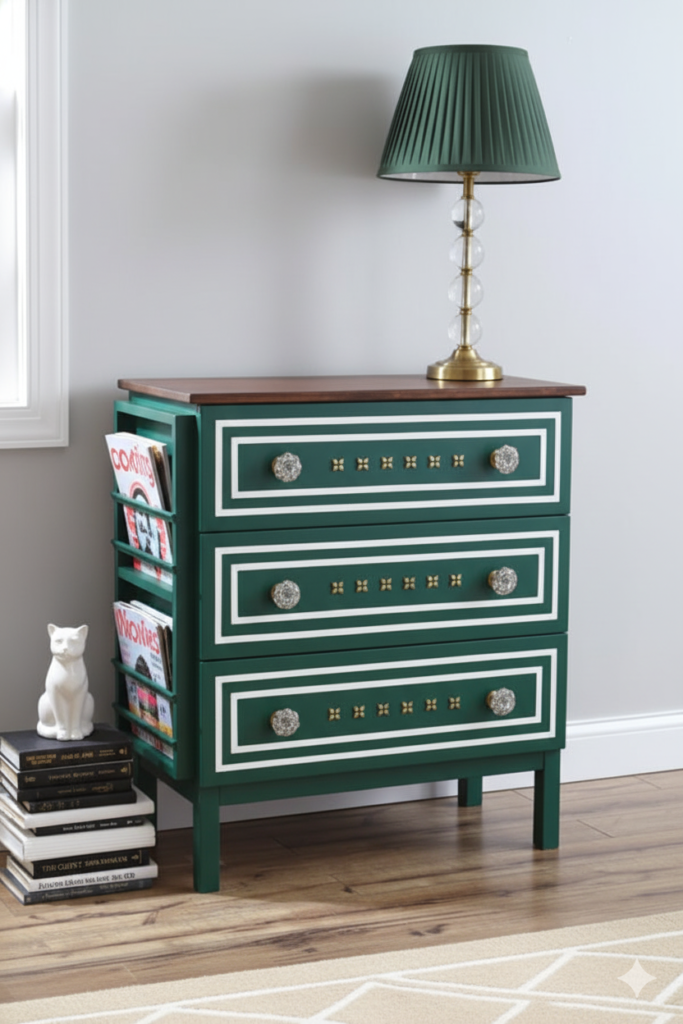
18. A Simple Stain Makeover
If your Rast dresser feels a bit plain, staining it can make a huge difference. I like this option because it keeps things natural but adds depth and richness.
You don’t need to be an expert to do this. Just take your time and follow the steps. Add a few gold details and new handles, and suddenly it looks modern and eye-catching.
19. From “Meh” to “Wow”
I know some DIY projects look intimidating at first. I’ve had that “no way I can do this” moment too. But once you break it down, it’s actually pretty simple.
Add fabric to the drawer fronts, use molding for detail, paint it fresh, and finish with legs and new pulls. Step by step, it all comes together. And in the end, you get a statement piece that feels totally unique.
Final Thoughts
So, which one are you tempted to try first? I always say start small—you’ll gain confidence as you go. Before you know it, you’ll be looking at every plain piece of furniture like it’s full of hidden potential.
Tell me, which idea feels most “you”?